This is a definitive guide to help you understand how easily you can access different features of Matic’s Validator Dashboard. You will able to view statistics, stake Matic tokens to become a validator or become a delegator, etc.
Accessing Matic Validator Dashboard
In order to access the dashboard, you can access it through the URL https://wallet.matic.today/staking
Your Dashboard will look something like this:

Here you will see options to view basic stats like Total Validators, Total Stake, Current Validators, so on and so forth.
You will also have options to Become a Validator or a Delegator. You will also have multiple tabs such as Wallet and Developer where you can view your Wallet balance and technical details respectively.
You will have to login to the Staking Dashboard in order to become a validator or delegator. You will also have to connect your wallet in order to initiate the staking process.
How to Login to Staking Dashboard
To login and connect your wallet to the Staking Dashboard you can click on the Login button.
You will be requested to connect your wallet to the Staking Dashboard. You will have options to connect it using Metamask or Matic Wallet (Web) or any WalletConnect compatible wallet.
We recommend using Matic Wallet or any other WalletConnect compatible wallet for a better experience.
To know more about WalletConnect compatible wallets you can read it here: https://walletconnect.org/apps/

Once your wallet is connected you can then choose paths to either become a validator or delegator.
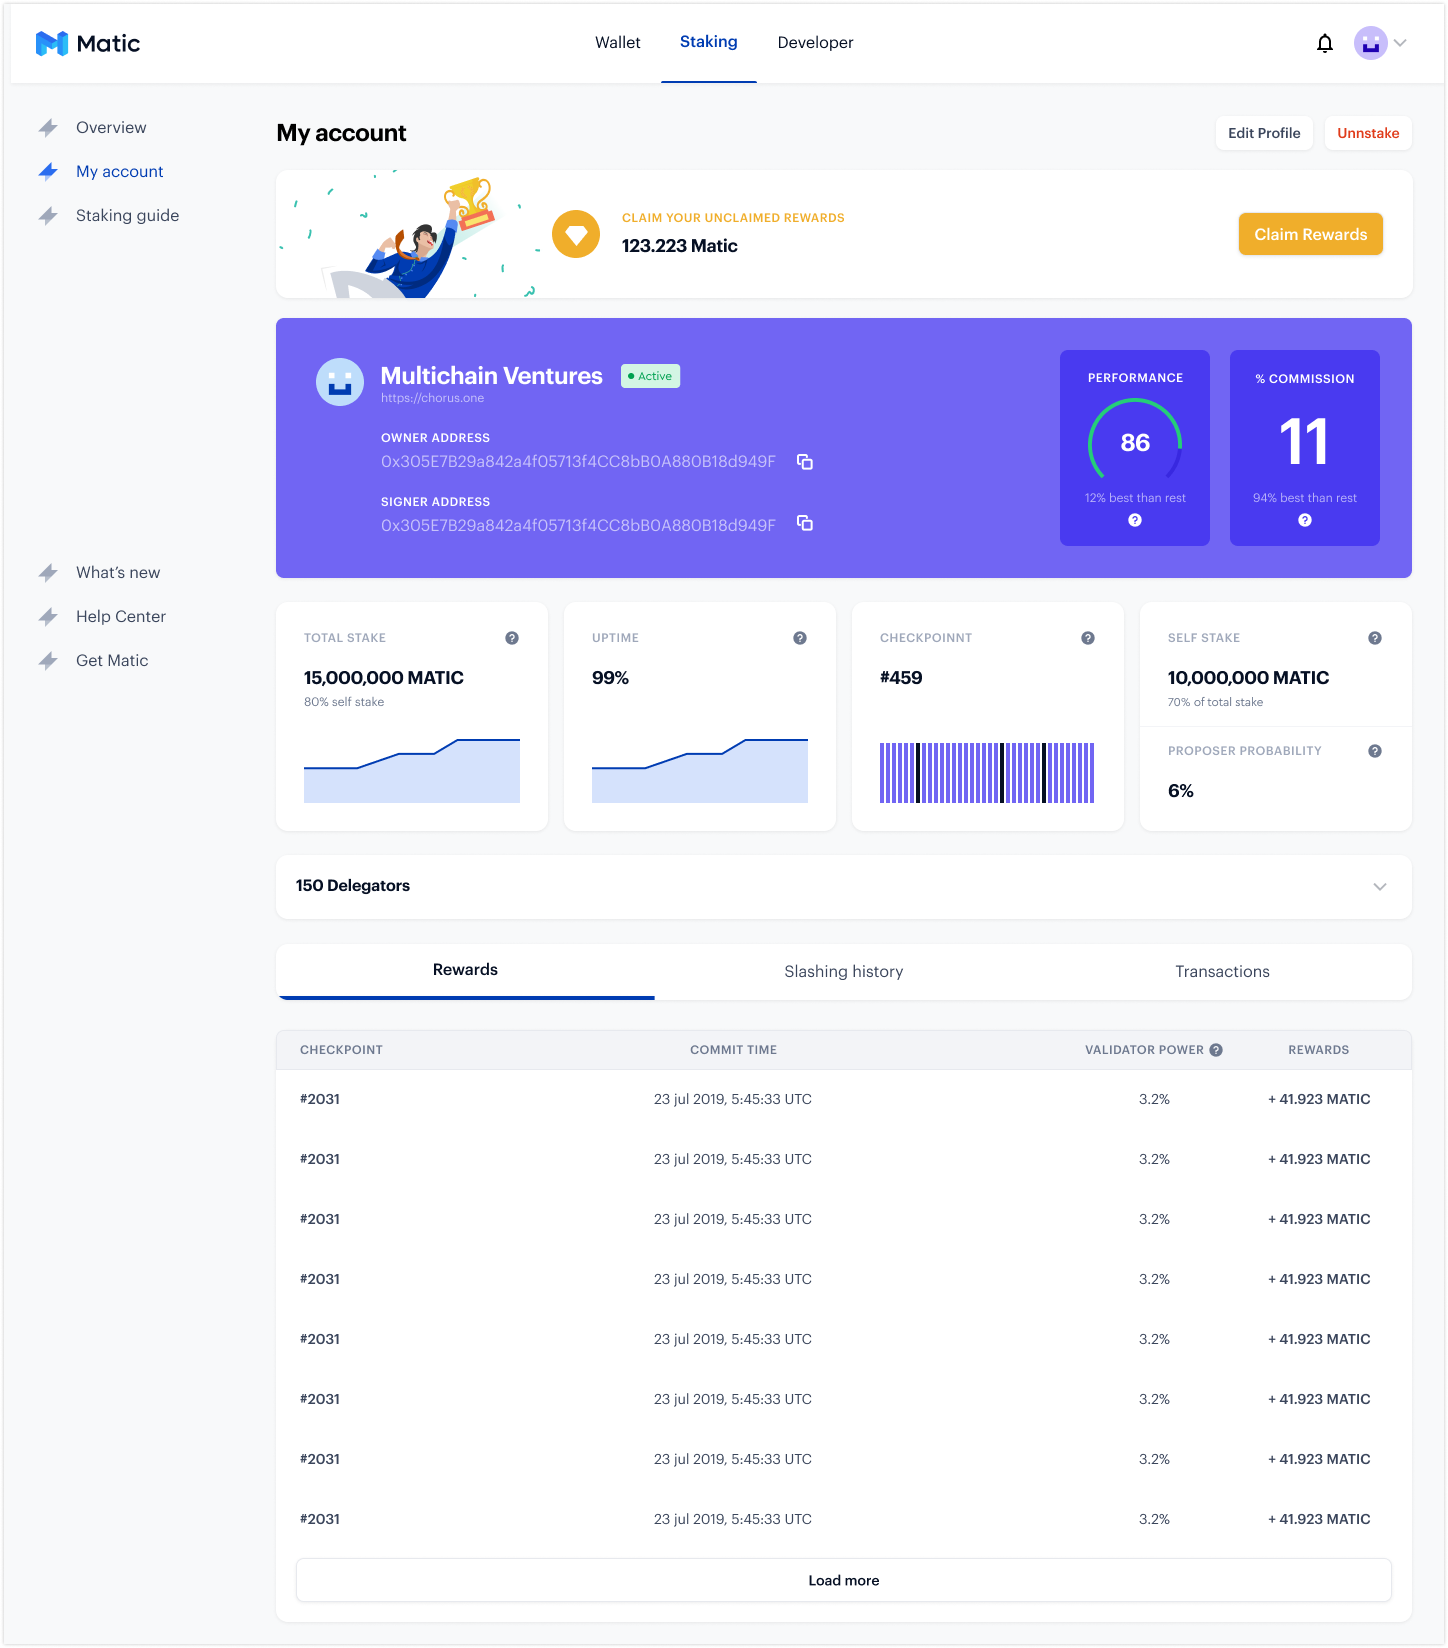
This is a screenshot of a user who is already a validator.
How to stake and become a validator on Matic
Staking to becoming a Validator is very easy and straightforward. With few clicks of a button, you will be ready to become a validator on Matic.
There are 2 paths to become a validator on Matic:
- Become a validator when a slot is already empty
- Become a validator by higher bidding
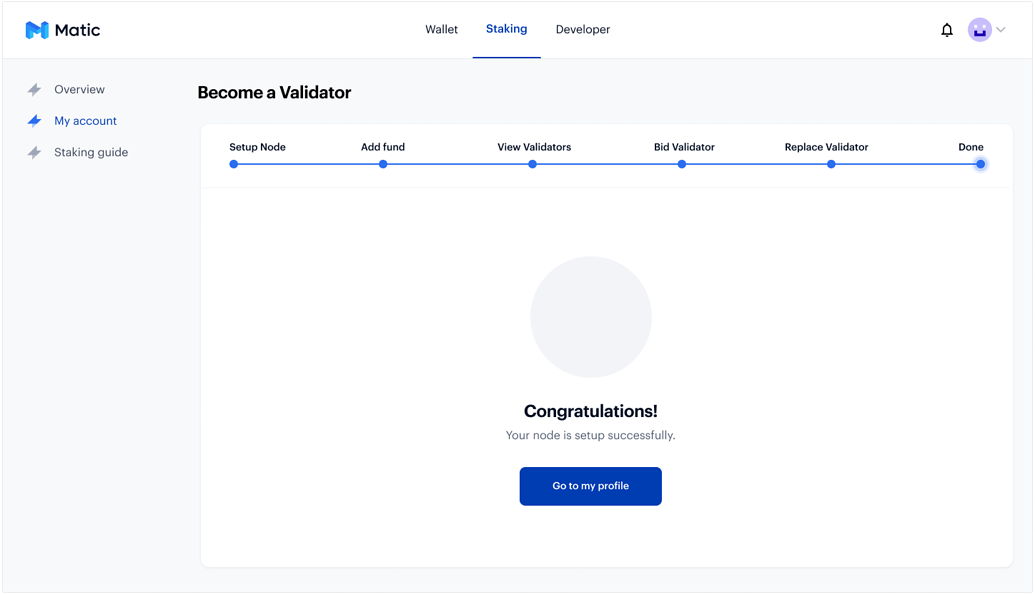
Become a Validator with an Empty Slot
Here, when you click on Become a Validator on the dashboard, you would be navigated to screen wizard which will take you through a step-by-step process of becoming a validator

The first step is to check if you have setup the node correctly. If you haven’t already setup the node, then you can choose any of the variants to setup your node.
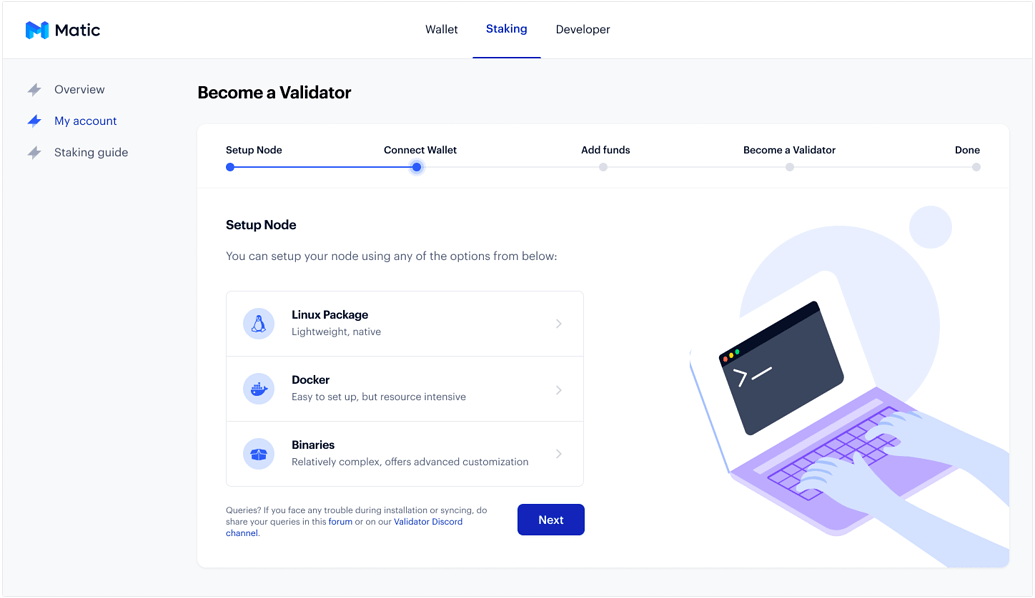
We recommend using the Linux package as your setup node as it is lightweight and native. The Docker images are slightly resource-intensive, and you if feel like tweaking or customizing your setup then you can go for the Binaries option to setup your node.
Once you have setup your node, you will need to make a note of the Signer address. This will be required during the staking process.
Once your node is setup, you can then go ahead with connecting your wallet with the Validator Dashboard. If your wallet is already connected, then you will skip this step and move to the Add Funds section.
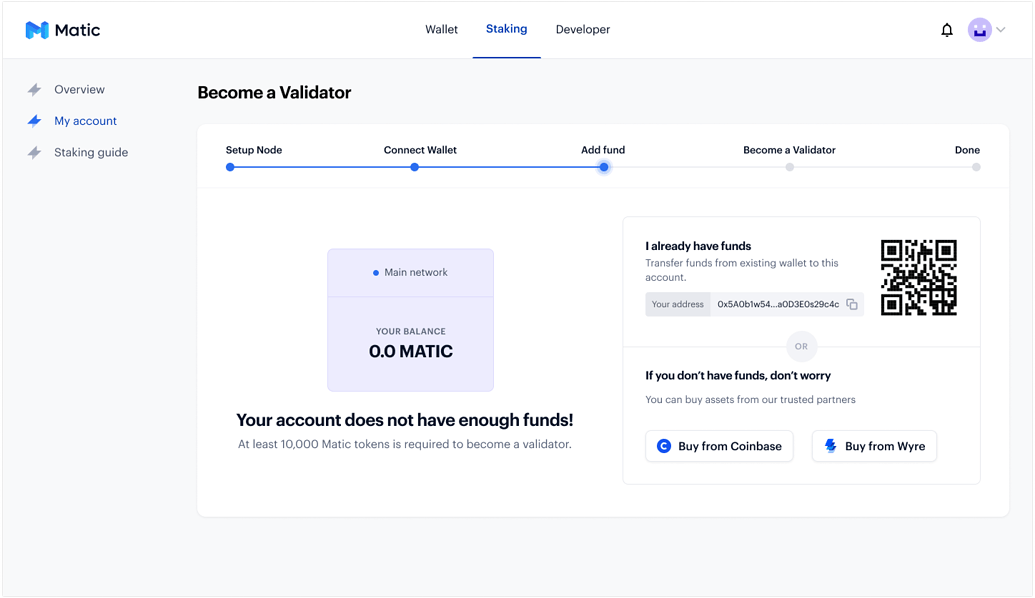
Once your wallet is connected, we will check if your Wallet has enough balance to initiate the staking on Matic. If your wallet does not have any funds or less funds then it will request you to add funds in your wallet.
- You can add funds to your wallet from another wallet by scanning the QR code, or
- You can buy some Matic Tokens from Coinbase or Wyre
Once your funds are added to the wallet, you will see your balances reflecting on this screen.
If you have multiple accounts in your wallet then you can just switch over to the correct account to reflect the balances on this screen.
If your wallet has the required number of tokens to start staking then you would skip this step and move to the next step of staking the tokens.
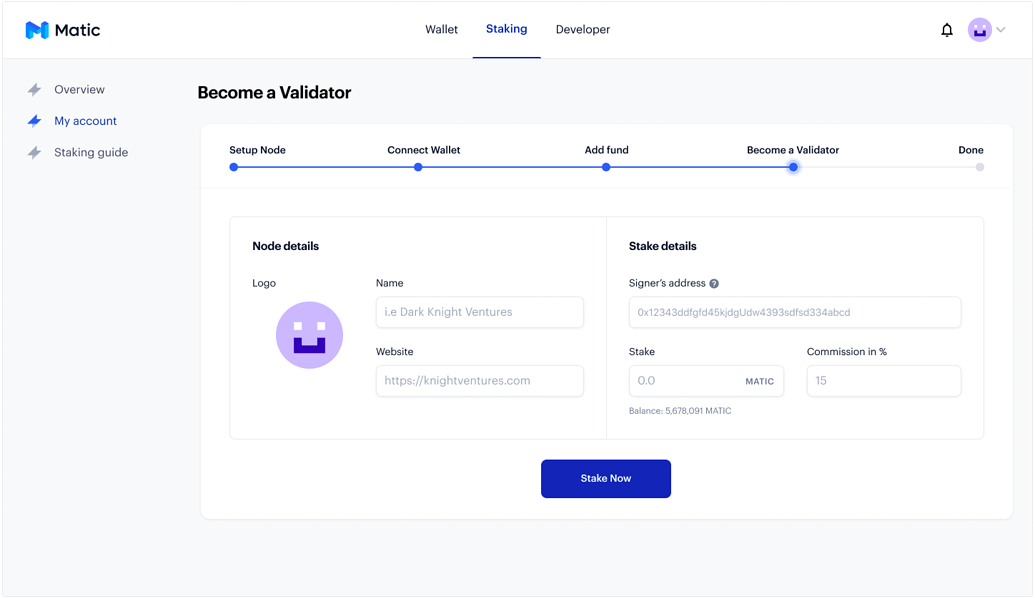
Here you will have options to name your Validator and provide details about it. You will also need your Signer address to be entered along the Stake Amount. All information fields are mandatory on this link.
Once all the fields are adequately filled, you can click on the Stake Now button.
Commission % will only show an estimated number and will not be an exact
Once everything is fulfilled and the transaction is confirmed, you would have successfully become a validator on Matic and ready to create blocks and earn rewards!
Once you have stake tokens to become a validator, you will, however, need to join the validator list. For now this can only be done using CLI.
The link on how to do this is here: https://docs.matic.network/staking/stake-on-matic/#validator-join
Once you have completed the Validator join, you will be then become a validator. You can view all the details of yours and other validators on the dashboard.